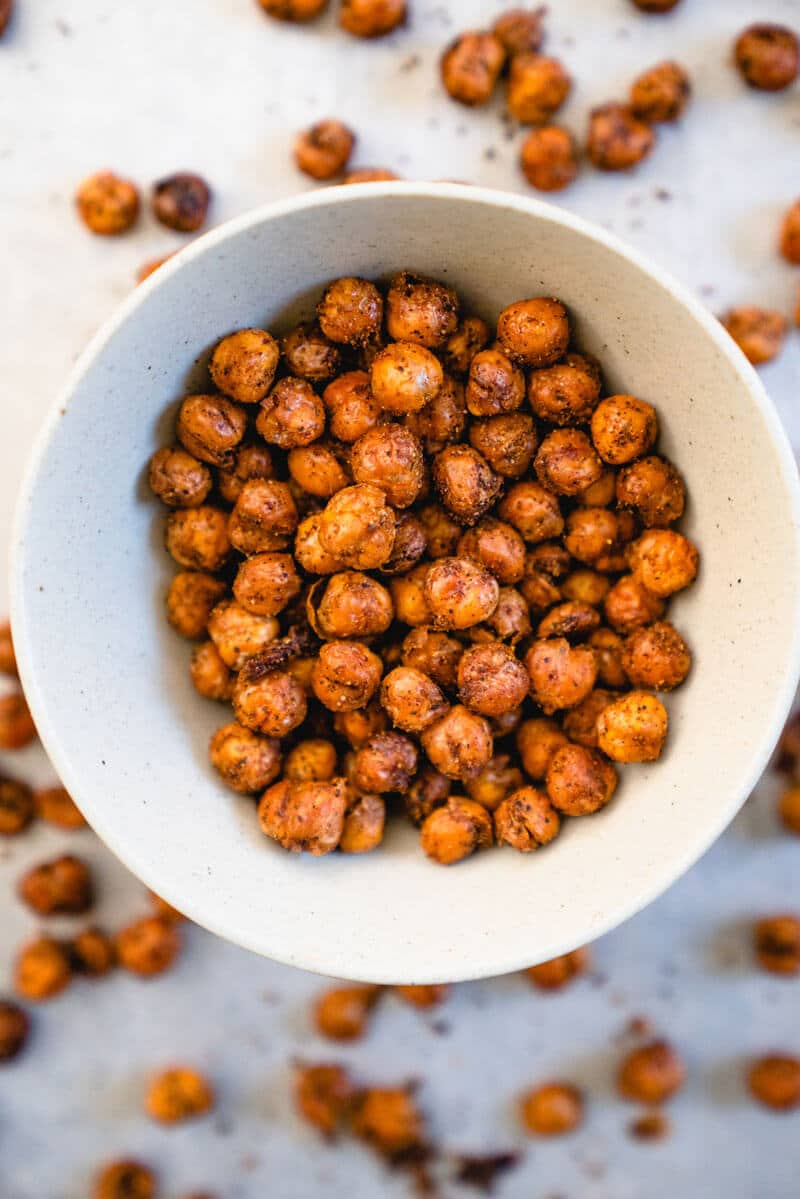
You know you’re a salty snack person when your ultimate splurge is a bag of salt and vinegar potato chips. Or a soft pretzel with nacho cheese. Or maybe french fries. OK, you get the idea! Of course, none of these are quite healthy snacks. For snacking on an everyday basis, Alex and I been on a mission to find new snacks that hit our salty snack craving. And that’s when we created this roasted chickpeas recipe. They’re crispy, crunchy, perfectly spiced, and they stay crunchy in the pantry for days. And they’re a naturally plant based and gluten free appetizer. Ready to make a batch? Mix it up & try it with black beans! Go to Crispy Roasted Black Beans
Why make roasted chickpeas at home?
Roasted chickpeas have become somewhat of a thing lately: they’re now even sold packaged in grocery stores. But why buy them when you can make them at home? They’re simple and so tasty, cheaper than the packaged kind and you know exactly what’s in them. It’s one of our favorite ways to use chickpeas: and we’re always temped to eat the entire pan when we make them! What are some of your favorite healthy snacks? Or crave-worthy splurges? Have you tried any packaged roasted chickpea brands that you love? Tell us in the comments below!
Bake time ensures these chickpeas stay crispy!
The main challenge in making roasted chickpeas at home is making chickpeas that stay crispy on the shelf. If you don’t bake them long enough, you’ll end up with soggy chickpeas a day later. To make chickpeas that stay crispy, you’ve got to bake them long enough. Because chickpea brands and ovens can vary, we’ve called for baking these chickpeas for a range of time: 45 to 60 minutes. Once you’ve played with different chickpea brands and your oven, you can start to get a feel for what timing is right for you. The first time, just make sure to keep an eye on the oven towards the end of the cooking time: they can change quickly from browned to over done!
Quickly remove some chickpea skins before baking.
Another tip for making crispy roasted chickpeas is to remove some of the chickpea skins before baking. The chickpea skin can also retain moisture. However, you don’t have to have them 100% removed, so don’t feel the need to spend a lot of time on this step. Here’s how to remove the chickpea skins:
Drain and rinse the chickpeas. Dry them with a towel to remove as much moisture as possible. (This is also key to making totally crispy chickpeas.) Then simply place another towel on top of the chickpeas and rub them with your hands to loosen the skins. Do this a few times: it should only take a few minutes — and you don’t need to worry about getting all of them!
Looking for healthy snack recipes?
Outside of these crispy roasted chickpeas, here are a few of our favorite healthy snack recipes:
Loaded Sweet Potato Rounds Healthy Greek Yogurt Ranch Dip Buffalo Cauliflower with Blue Cheese Dip Green Hummus Very Verde Cilantro Dip Honey Sesame Almonds Herb Butter Popcorn Cinnamon Yogurt Fruit Dip More Healthy Snack Recipes
This roasted chickpeas recipe is…
Vegetarian, vegan, plant-based, gluten-free and dairy-free. Last updated: December 2019 5 from 5 reviews