Embark on a culinary journey through the vibrant flavors of India with the creation of lauki ka raita, a delightful yogurt-based dish infused with the subtle essence of bottle gourd. As you delve into the intricacies of preparing this luscious accompaniment, each step unveils a symphony of flavors and textures, culminating in a harmonious blend that tantalizes the taste buds. Let’s explore the art of making lauki raita in the following steps, from whipping the yogurt to adjusting the consistency and serving it chilled.
Step 1: Preparing the Creamy Base
Begin the culinary adventure by whipping the yogurt to perfection, creating a creamy base that serves as the canvas for the upcoming infusion of flavors. Adjust the consistency with milk, aiming for a texture resembling pancake batter—smooth and velvety, yet with a slight thickness that holds its form. This foundational process is key to understanding how to make lauki raita, setting the stage for the transformative journey ahead.
Step 2: Heating Oil and Infusing Flavors
In a saucepan, the culinary symphony commences as the oil sizzles to life over medium-high heat, signaling the start of a flavorful escapade. Introduce cumin seeds and asafetida to the shimmering oil, allowing their fragrant essence to permeate the air—a prelude to the aromatic dance of lauki. As the spices release their captivating aroma, add red chilies, igniting a fiery overture in the process of how to make lauki raita. This flavorful blend sets the stage for the starring ingredient, the humble bottle gourd.
Step 3: Stir-Frying Lauki and Aromatic Elements
Harmonize the flavors within the saucepan by adding lauki, ginger, green chilies, and cilantro, each ingredient adding its unique melody to the culinary composition. Stirring diligently, allow the ingredients to intertwine, coaxing out their inherent flavors as the lauki tenderizes and most of its water evaporates. In just four to five minutes, this vibrant medley becomes a pivotal step in the process of making lauki ka raita, infusing the dish with the rich essence of bottle gourd.
Step 4: Blending Lauki into Yogurt
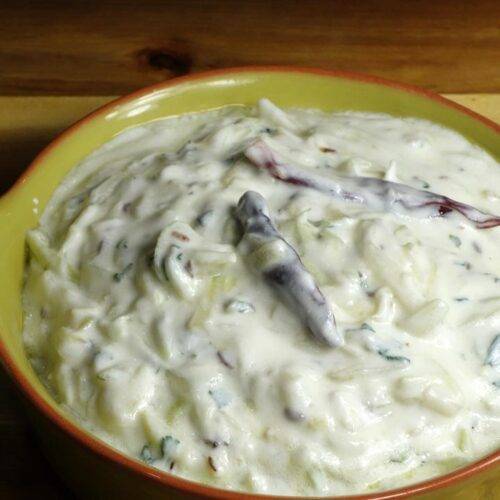
Once the stir-fried lauki has cooled to a gentle warmth, seamlessly blend it into the whipped yogurt—a transformative moment in the journey of how to make lauki raita. This integration forms the heart of lauki ka raita, marrying creamy textures with vibrant flavors in a harmonious union. Ensure a seamless amalgamation by thoroughly mixing the cooled lauki into the yogurt, allowing the flavors to meld and evolve.
Step 5: Adjusting Consistency and Chilling
Fine-tune the lauki raita’s consistency to perfection by adding more milk if necessary, a meticulous detail in perfecting the lauki ka raita recipe. This adjustment ensures a harmonious blend of ingredients, resulting in a delectable texture that is neither too thick nor too thin. For an optimal dining experience, allow the flavors to meld and intensify by serving the raita chilled—a refreshing conclusion to the culinary journey of how to make lauki raita.
In conclusion, the art of crafting the perfect lauki raita transcends mere culinary skill—it is a testament to the harmony of flavors and textures, the balance of spices and aromatics, and the meticulous attention to detail. Each step in the process, from whipping the yogurt to adjusting the consistency and serving it chilled, contributes to the creation of a dish that delights the senses and nourishes the soul. So, gather your ingredients, ignite the flames of your culinary creativity, and embark on a flavorful voyage through the enchanting world of lauki ka raita.
I tried this s recipe yesterday and turned out very refreshing and tasty. Very easy to make and perfect for summer. Thanks Manjula aunty for awesome recipes
Lauki ka Raita looks delicious. wil give it a try. Thanks for Recipe Manjula Ji
very healty and tastey Lauki Ka Ratia Thanks
Very good recipe. I was looking for a good recipe for lauki raita. In most cooking sites, the lauki is boiled and the water is drained, but I prefer your method of cooking the lauki for 4 to 5 minutes, that way the nutrients of lauki are retained. I can’t wait to try out your recipe. Thank you so much!
Password
Remember Me